Authentication using JWT
How to use JSON Web Token to authenticate with deepstream
Authentication is vital to most apps and the way it is achieved has evolved substantially in recent years. One of the most popular of today’s concepts is a standard called JSON Web Token or JWT for short that lets you store encrypted information in verifiable tokens.
These tokens are compact and self-contained encoded JSON objects that hold vital information which is transferred between different parties (clients/servers most times). The compact nature makes it possible to exchange them via request headers while the self-contained characteristics shine at JWT’s ability to store authentication payload making JWT not just useful at authentication but also handy in information exchange.
JWTs have three parts: header, payload, and signature:
- The header holds the hashing algorithm, and the type (which is most time
jwt). - The second part which is payload consists of authentication data usually known as claims. - The signature is created by signing the header and payload using the hashing algorithm and secret. This signing process is what verifies the token.
deepstream can use a number of strategies to authenticate incoming connections. For JWT we’ll use the HTTP-Webhook - a configurable URL that deepstream will send both login and connection data to for verification.
Should you use JWT with deepstream?
Maybe. Traditional tokens serve as primary keys to session data, meaning they help the backend retrieve data relative to a user’s session from a database or cache. A JWT, on the other hand, IS the actual session data - the cookie itself contains a payload and releases the backend from having to constantly look session data up.
This is great for HTTP workflows where clients make many individual requests that are all associated with the same user. deepstream, however, uses a persistent connection that is only established once when the client connects (okay, and maybe occasionally again if the connection drops). All session data stays associated with that connection, rather than with the requests and subscriptions made through it. As a result, deepstream messages are significantly smaller and faster than their HTTP equivalents.
This, however, does mean that deepstream itself doesn’t benefit much from using JWT. It doesn’t hurt much either though and can still be helpful when deepstream is used in conjunction with traditional HTTP endpoints.
deepstream’s Auth Webhook
Before you begin performing authentication with JWT, it’s worth noting that deepstream allows you to register an HTTP endpoint URL to which connection data is forwarded as POST request whenever a client or backend process attempts to log in.

The HTTP Authentication guide covers how to setup this workflow in your project.
deepstream HTTP Auth with JWT
JWT allows us to transport claims securely from the server to client and vice versa using an encoded JSON string. This token is persisted on the client and used to make authorized requests as long as the token is valid (not tampered with and not expired).
Looking back at the flow described above, JWT needs to be put somewhere in the picture. For that, there are two choices:
The simple, but less secure one
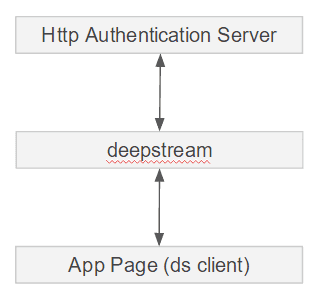
In this scenario, the deepstream client sends the user’s credential to deepstream which forwards it to a configured HTTP endpoint.
The endpoint creates the JWT and passes it back through deepstream to the client which stores it in localStorage
For subsequent requests, the token is already in localStorage and will be sent by the client instead of asking the user for credentials.
Why is this less secure?
Storing the token in localStorage or in a cookie using javascript makes it readable by all scripts on the page. This leaves it open for cross-site scripting attacks (XSS) that can hijack the session.
Likewise, this approach requires the web application itself and all its assets to be publicly readable. Using the following approach, however, would allow you to redirect all unauthenticated requests to the web app to a login page.
The complicated, secure one
The recommended workflow looks as follows:

The steps shown here are
- The user provides credentials in a static login page which are sent via HTTP POST request to the auth server.
- If the provided credentials are valid, the server generates a JWT and responds with a 301 redirect to the web-app page that stores the token as a cookie
- The deepstream client establishes a connection to the deepstream server and authenticates itself by calling
ds.login(null, callback). This sends the stored cookie containing the JWT to the deepstream server. - deepstream forwards the cookie to the authentication server and awaits its reply. The auth server also has the option to parse the cookie and provide the data it contains back to deepstream to use within Valve Permissions. If the authentication server returns a positive response (e.g. HTTP code 200) the connection is authenticated.
So much for the theory - here’s how this works in practise:
Our app will offer the following URLs:
/the actual webapp with the deepstream client script. The server will only allow access to paths within that route if a JWT is provided/loginthe publicly accessible login page/handle-loginthe login form posts its content to this URL/check-tokendeepstream will forward the auth data for incoming connections to this URL
Let’s start with the login page
We’ll start by creating a static HTML page with a simple login form.
<form action="/handle-login" method="POST">
    <div class="form-group">
        <label for="username">Username</label>
        <input type="text" id="username" name="username" class="form-control">
    </div>
    <div class="form-group">
        <label for="password">Password</label>
        <input type="password" id="password" name="password" class="form-control">
    </div>
    <div class="form-group">
        <button class="btn btn-primary" type="submit" id="login-button">Login</button>
    </div>
</form>
Just two inputs — a username and a password. Once te user hits login, the credentials are sent to a /handle-login route. Using Node with Express the route can be handled using the following approach:
// . . .
const jwt = require('jsonwebtoken');

app.post('/handle-login', function(req, res, next) {

   const users = {
    wolfram: {
      username: 'wolfram',
      password: 'password'
    },
    chris: {
      username: 'chris',
      password: 'password'
    }
    // . . .
  }

  const user = users[req.body.username];

  if (!user) {
      res.status(403).send('Invalid User')
    } else {
      // check if password and username matches
      if (user.username != req.body.username || user.password != req.body.password) {
        res.status(403).send('Invalid Password')
      } else {

        // if user is found and password is right
        // create a token
        const token = jwt.sign(user, 'abrakadabra');

        // return the information including token as JSON
        // set token to cookie using the httpOnly flag
        res.cookie('access_token', token, {httpOnly: true}).status(301).redirect('/');
      }
    }
});
This method validates the provided credentials. For simplicities sake they’re hardcoded in this example - in a real world app store usernames and password hashes in a database.
Once validated, the jsonwebtoken module is used to generate and sign a token using the auth payload. The token is then stored in a client-side cookie as access_token while the httpOnly flag is set to true in order to disable javascript access from the client. Finally, authenticated users are redirected to the actual application page containing the deepstream client.
Enabling HTTP Auth
Next up, we need to start a deepstream server with enabled HTTP Authentication. This can be achieved via the configuration file while setting up some configuration as well:
type: http
options:
  endpointUrl: https://someurl.com/check-token
  permittedStatusCodes: [ 200 ]
  requestTimeout: 2000
This configuration instructs the deepstream server to make a POST request to https://someurl.com/check-token every time a client tries to connect. Only if it receives a response with an HTTP status code of 200 in less than 2 seconds it will allow the connection.
deepstream Login
From the deepstream client we can now call client.login()
const deepstream = require( '@deepstream/client');
const client = new DeepstreamClient('localhost:6020')
  // Login method
  .login( null, ( success, clientData ) => {

  })
  .on( 'error', ( error ) => {
    console.error(error);
  });
Rather than user-credentials we just pass null to this method - the information we’re interested in, the JWT will be part of the header-data that’s sent along with the authentication request as req.body.connectionData.headers.cookie.
Your next login attempt will produce the following log:
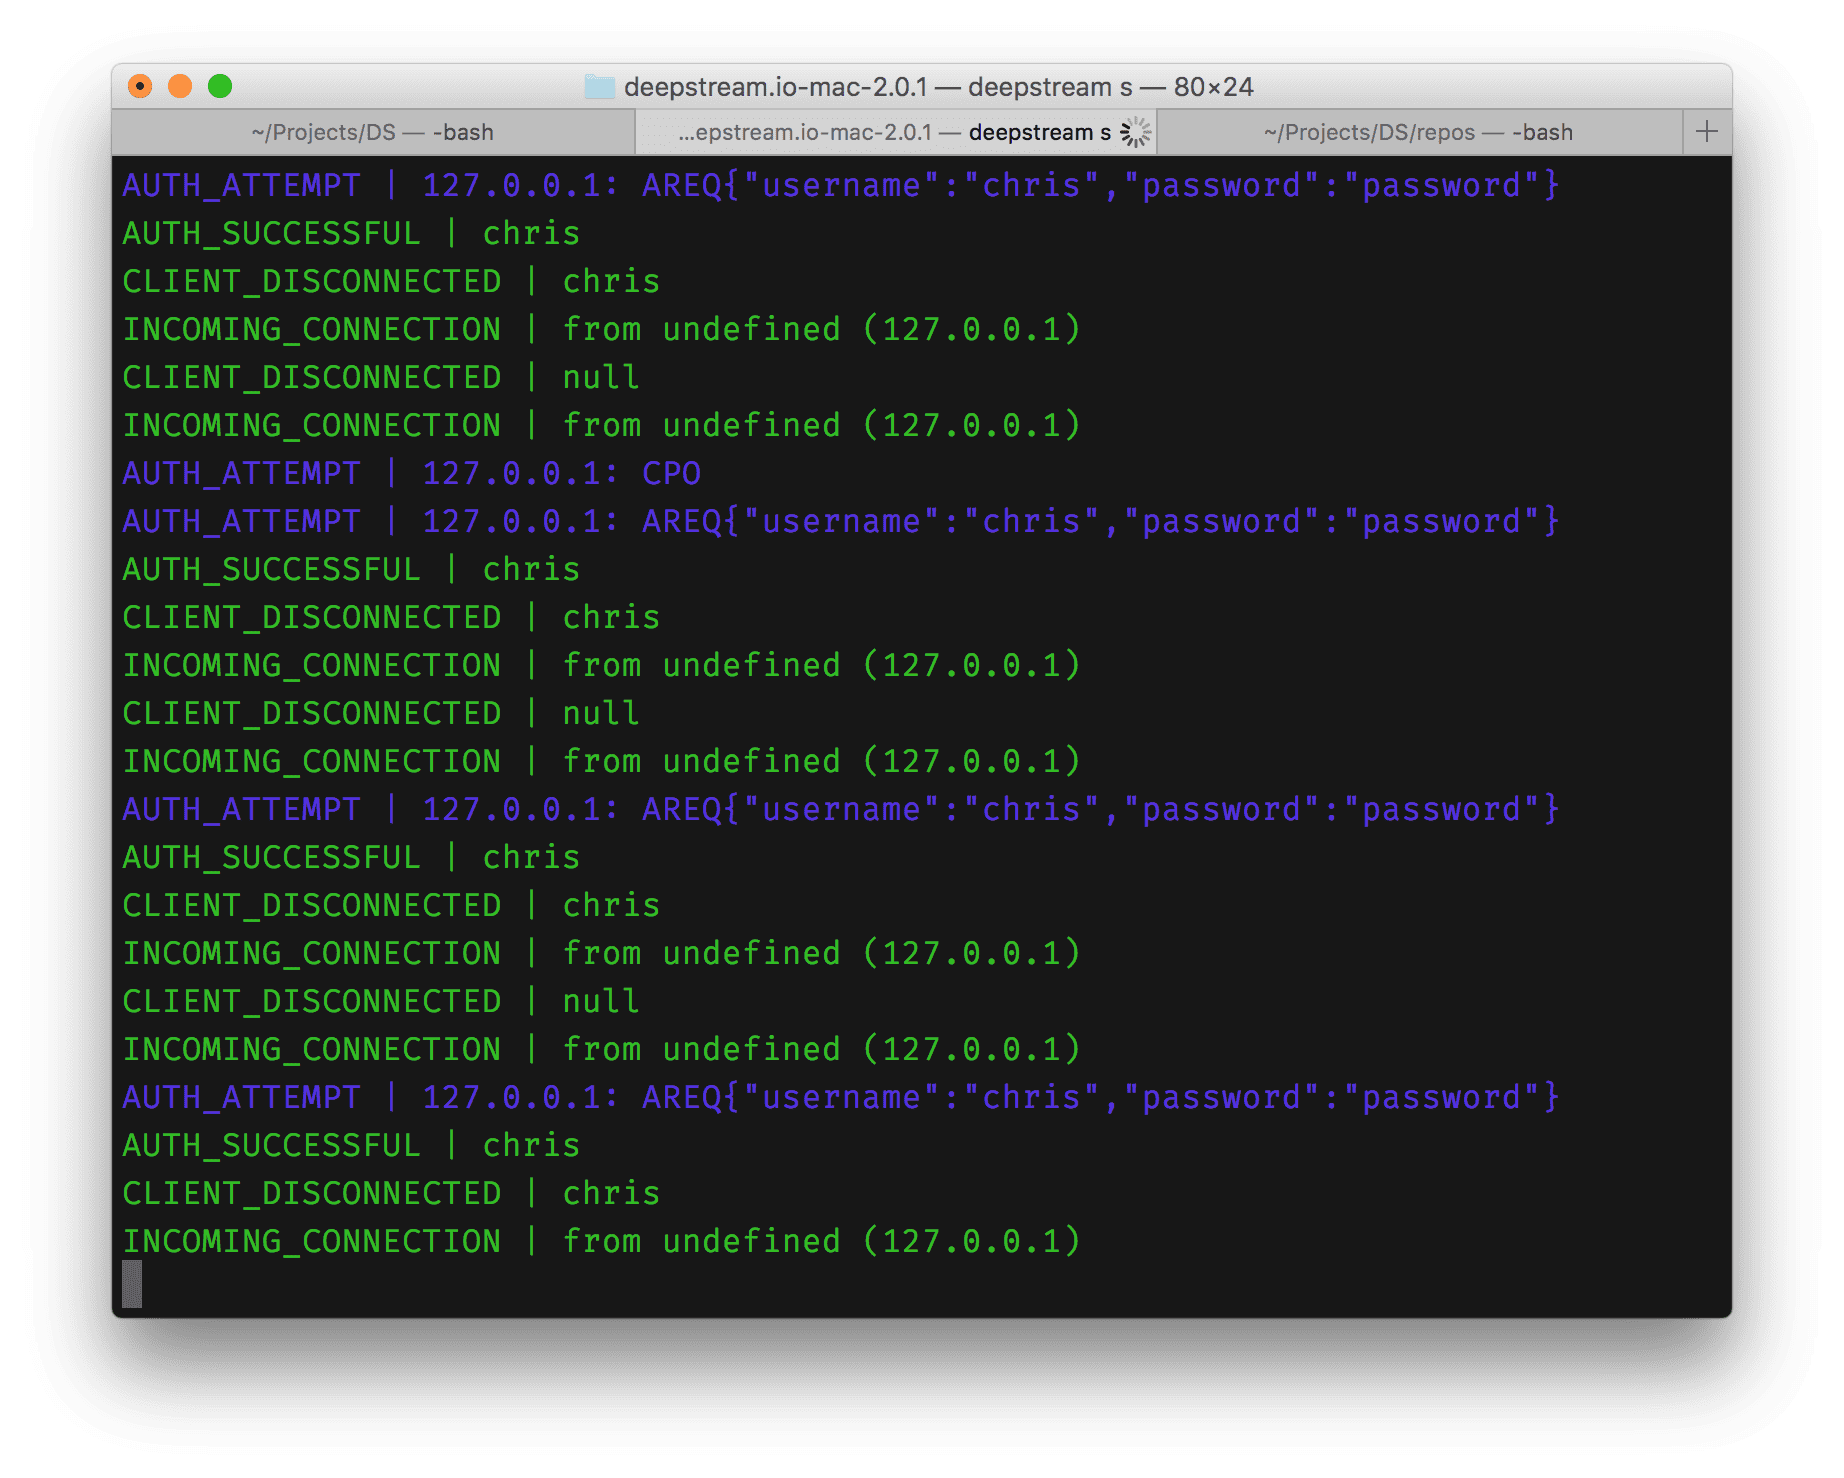
HTTP Auth Call
Upon calling ds.login() deepstream posts the connection data to the configured /check-token route:
//. . .
const jwt = require('jsonwebtoken');

app.post('/check-token', function(req, res) {
  const token = getCookie(req.body.connectionData.headers.cookie, 'access_token');
  jwt.verify(token, 'abrakadabra', function(err, decoded) {
      if (err) {
        res.status(403).send('Failed to authenticate token.' );
      } else {
        // if everything is good, save to request for use in other routes
        res.status(200).json({
          username: decoded.username
        });
      }
    });
});

function getCookie( src, name ) {
  const value = "; " + src;
  const parts = value.split("; " + name + "=");
  if (parts.length == 2) return parts.pop().split(";").shift();
}
Again we use the jsonwebtoken module to verify the token and decode the string into a JavaScript object containing the username which we pass back to deepstream to identify the connection.
Protecting Routes
This covers the general JWT authentication flow - however using JWT we can also prevent any unauthenticated access to our application at route /
Express makes this easy by adding a middleware function that checks for the existence of a valid JWT before proceeding to process a request.
const jwt = require('jsonwebtoken');
const authMiddleware = function(req, res, next) {


  const token = req.cookies.access_token;

  // decode token
  if (token) {
    // verifies secret and checks exp
    jwt.verify(token, 'abrakadabra', function(err, decoded) {
      if (err) {
        return res.json({ success: false, message: 'Failed to authenticate token.' });
      } else {
        // if everything is good, save to request for use in other routes
        req.decoded = decoded;
        next();
      }
    });

  } else {

    // if there is no token
    // return an error
    return res.status(403).redirect('/login');

  }
}

// Protect route with middleware
app.post('/protected', authMiddleware, routeHandler);